What is a buzzer?
A buzzer is an electronic device that produces a sound or beep when an electrical signal is applied to it. Buzzers are widely used in a variety of applications, including alarm systems, timers, toys, and electronic devices, as a means of alerting or signalling a user.
There are two main types of buzzers: magnetic and piezoelectric. Magnetic buzzers use an electromagnet to vibrate a metal diaphragm and produce sound, while piezoelectric buzzers use the piezoelectric effect to cause a piezoelectric material to vibrate and produce sound.
In Arduino projects, buzzers can be connected to an Arduino board to provide audio feedback or to create simple sound effects. By controlling the frequency and duration of the electrical signal applied to the buzzer, different sounds and patterns can be generated.
Buzzers can also be used in combination with other sensors and devices to create more complex systems, such as alarm systems, music players, or games. By combining the buzzer with other components, such as LEDs, buttons, or displays, more sophisticated and interactive systems can be created.
What is a Piezoelectric Buzzer?
A piezoelectric buzzer is an electronic device that uses the piezoelectric effect to generate sound. The piezoelectric effect is a phenomenon in which a material generates an electrical charge in response to applied mechanical stress. In a piezoelectric buzzer, a piezoelectric material, such as quartz crystal, is used to convert an electrical signal into mechanical vibration and generate sound.
Piezoelectric buzzers are commonly used in a variety of applications, including alarms, timers, toys, and electronic devices, due to their high reliability and low power consumption. They can also be used to generate a range of different tones and frequencies, making them suitable for a variety of signaling and audio applications.
Piezoelectric buzzers are easy to use and integrate into electronic systems, as they typically require only a simple electrical signal to generate sound. In addition, they are typically compact and lightweight, making them ideal for portable and compact devices.
The applicability of piezoelectric buzzer is enhanced by the following features:
- Lightweight
- Simple construction
- Low-cost
- The flexibility of construction in a wide range of sizes that work across varying frequencies to produce different sound outputs
Piezo Buzzers are of 2 types: Active Buzzers and Passive Buzzers.
What are active piezo buzzers?
Active piezo buzzers are electronic devices which only need a DC voltage to produce sound. An active buzzer generates the sound itself without needing a signal source providing sound. One can basically just turn it on or off.
Specifications of Piezo buzzer
- Input Voltage(Max.) : 5V
- Resistance: 42 Ω
- Resonance Frequency: 2048 Hz
Piezoelectric buzzer pin diagram
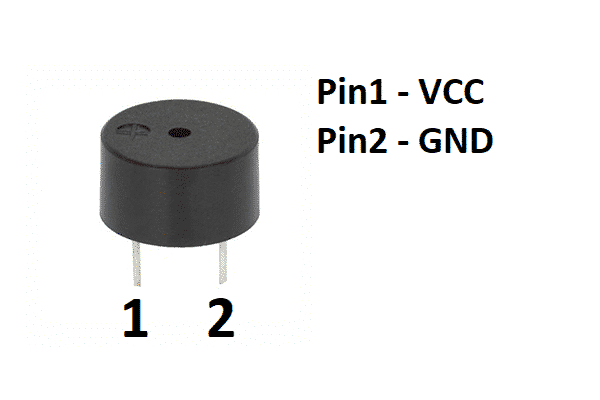
Pin uses
Pin1: It is a VCC pin. It is used to connect 5V to the piezo buzzer.
Pin2: It is a GND pin. It is used to connect GND to the piezo buzzer.
Circuit diagram for interfacing Piezoelectric buzzer with Arduino
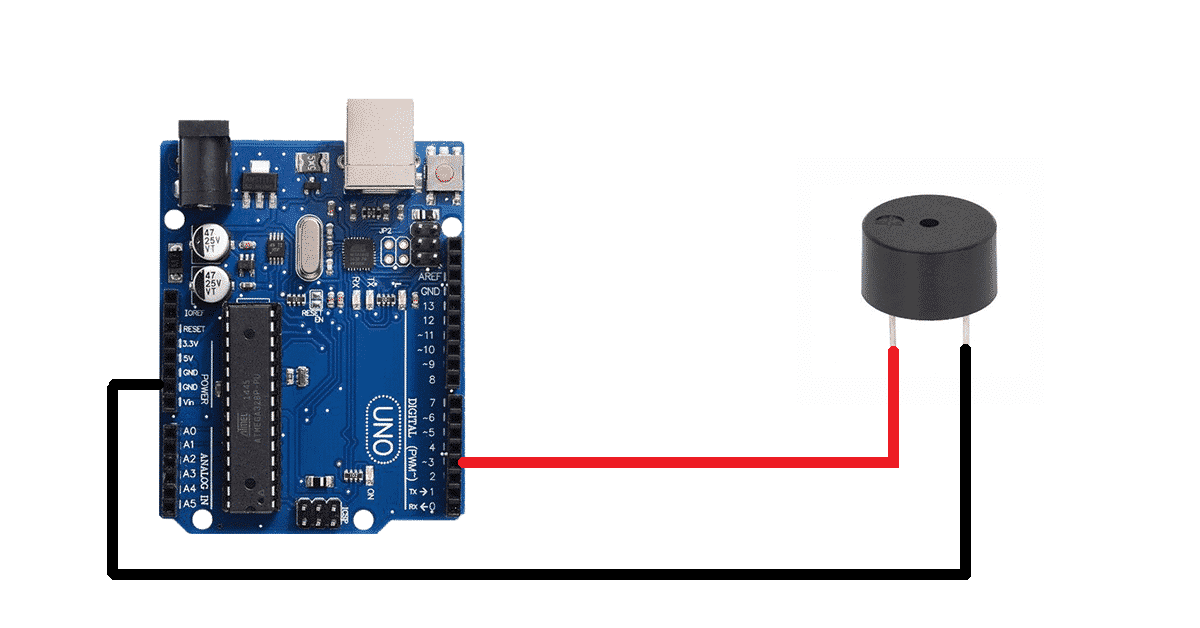
Pin connections of the Piezoelectric buzzer with the Arduino UNO
Connect pin 1 of the Piezoelectric buzzer to the D3 pin of the Arduino UNO board.
Connect pin 2 of the Piezoelectric buzzer to the GND pin of the Arduino UNO board.
Arduino Code for interfacing Piezoelectric buzzer with Arduino
int buzzer=3;
void setup() {
  // put your setup code here, to run once:
pinMode(buzzer,OUTPUT);
}

void loop() {
  // put your main code here, to run repeatedly:
tone(buzzer,13500);
}
Arduino code working
int buzzer=3;First, declare a variable to store the pin number. We are storing pin 3 in variable named buzzer.
void setup() {
  // put your setup code here, to run once:
pinMode(buzzer,OUTPUT);
}
Inside void setup(), set buzzer pin as OUTPUT. We will use this pin to send a signal to the buzzer.
void loop() {
  // put your main code here, to run repeatedly:
tone(buzzer,13500);
}
We will use the tone() function to send different sounds to the buzzer. Write tone, inside bracket write pin number/name, then a comma and after that write the frequency that you want to send to the buzzer.